 |
| Adding shutters made our house a little more polished and cozy. |
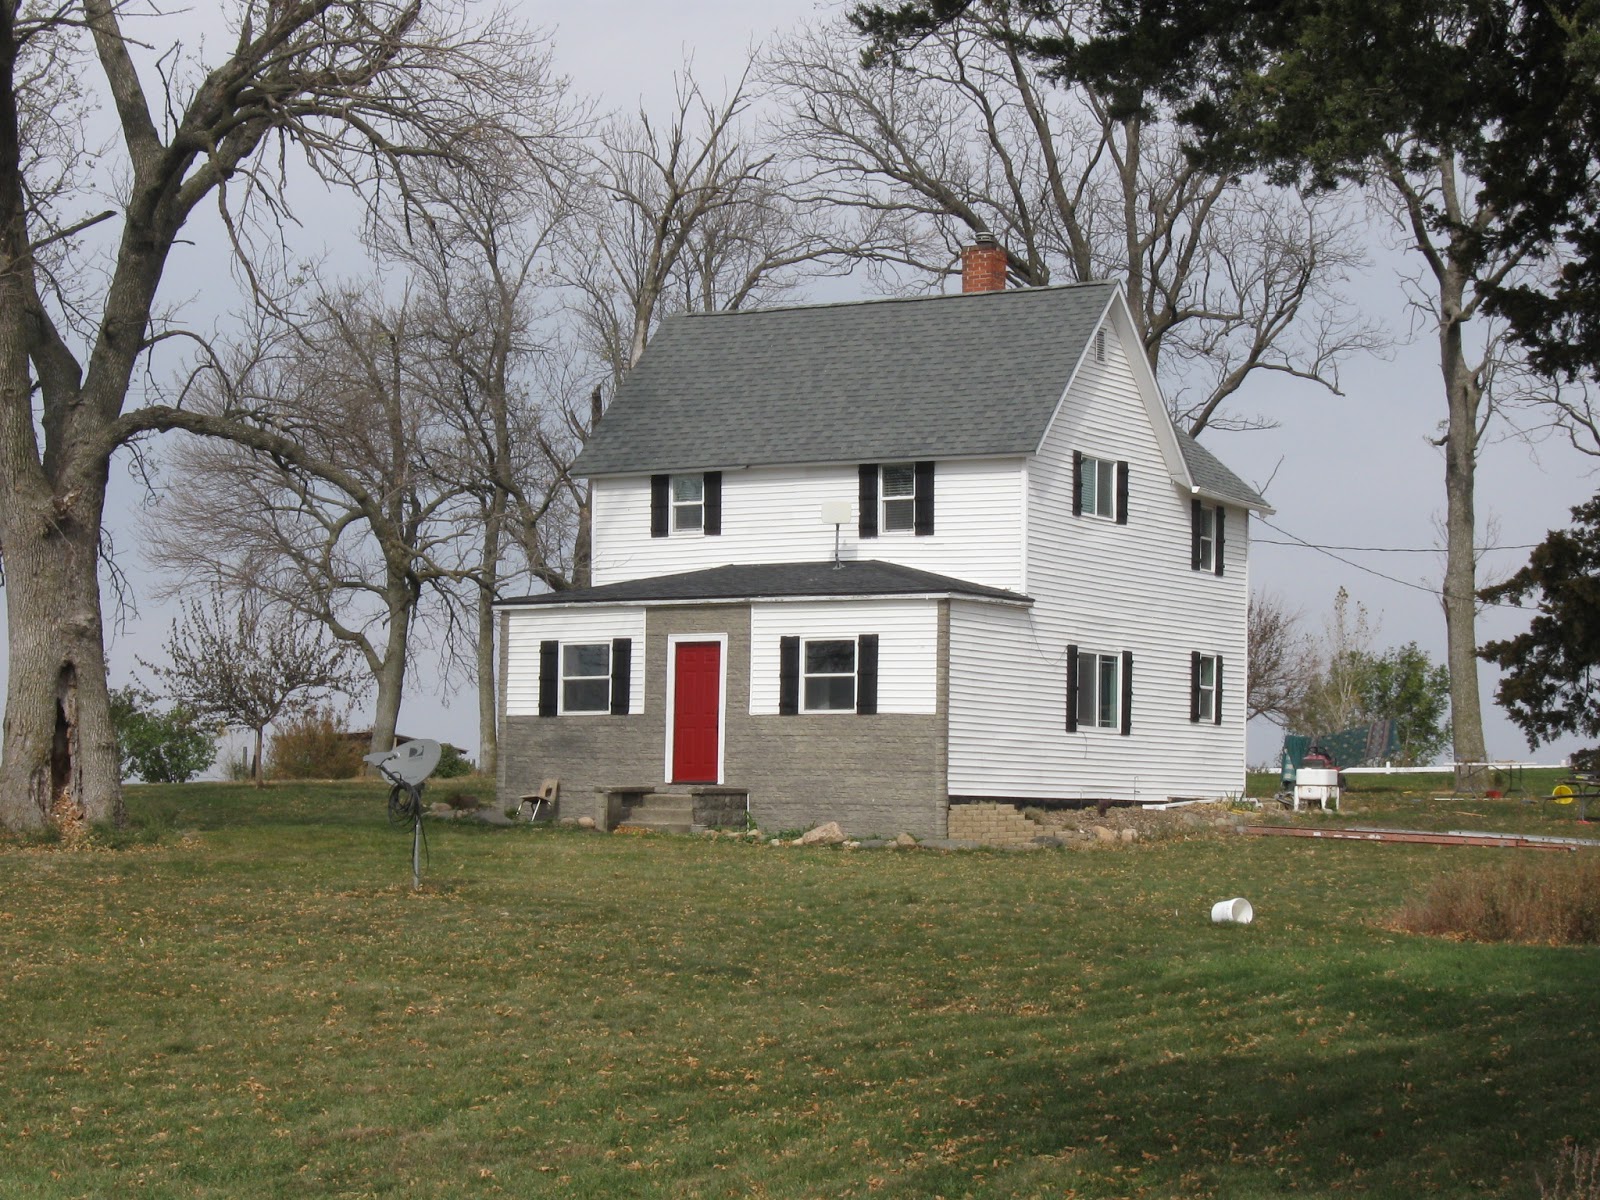
After a few admirers of our humble farmstead suggested we put up shutters, Jack and I were determined to make it a reality. Whenever possible, we try to do our own woodwork to avoid the cost of buying materials and to add a personalized touch to the house. So we grabbed a few pieces of barn wood and got to work. If you’re up for a Saturday project, you can make some of your own board and batten shutters for your house. It really isn’t too difficult and these instructions can be modified to suit your needs from how wide you’d like your own shutters to whether or not you’d like a gap between the boards to the number of battens on each shutter (see photo example below).
 |
| Example of different types of board and batten shutters to give you an idea of the variety. |
You’ll Need:
Tape measure, drill, screw driver, maker, etc
Lumber
Exterior, rust-proof screws
Wood glue
Exterior Paint
1. Measure the height of all the windows that you’d like shutters for, adding an additional inch or so for a bit of wiggle room. Also determine how wide you’d like your shutters to be (for example: our windows are several different heights but we decided to make all the shutters twelve inches wide, regardless of the height).
2. Cut six pieces of wood the height of the window plus one inch (three pieces for each side of the window). The wood should also be an equal width.
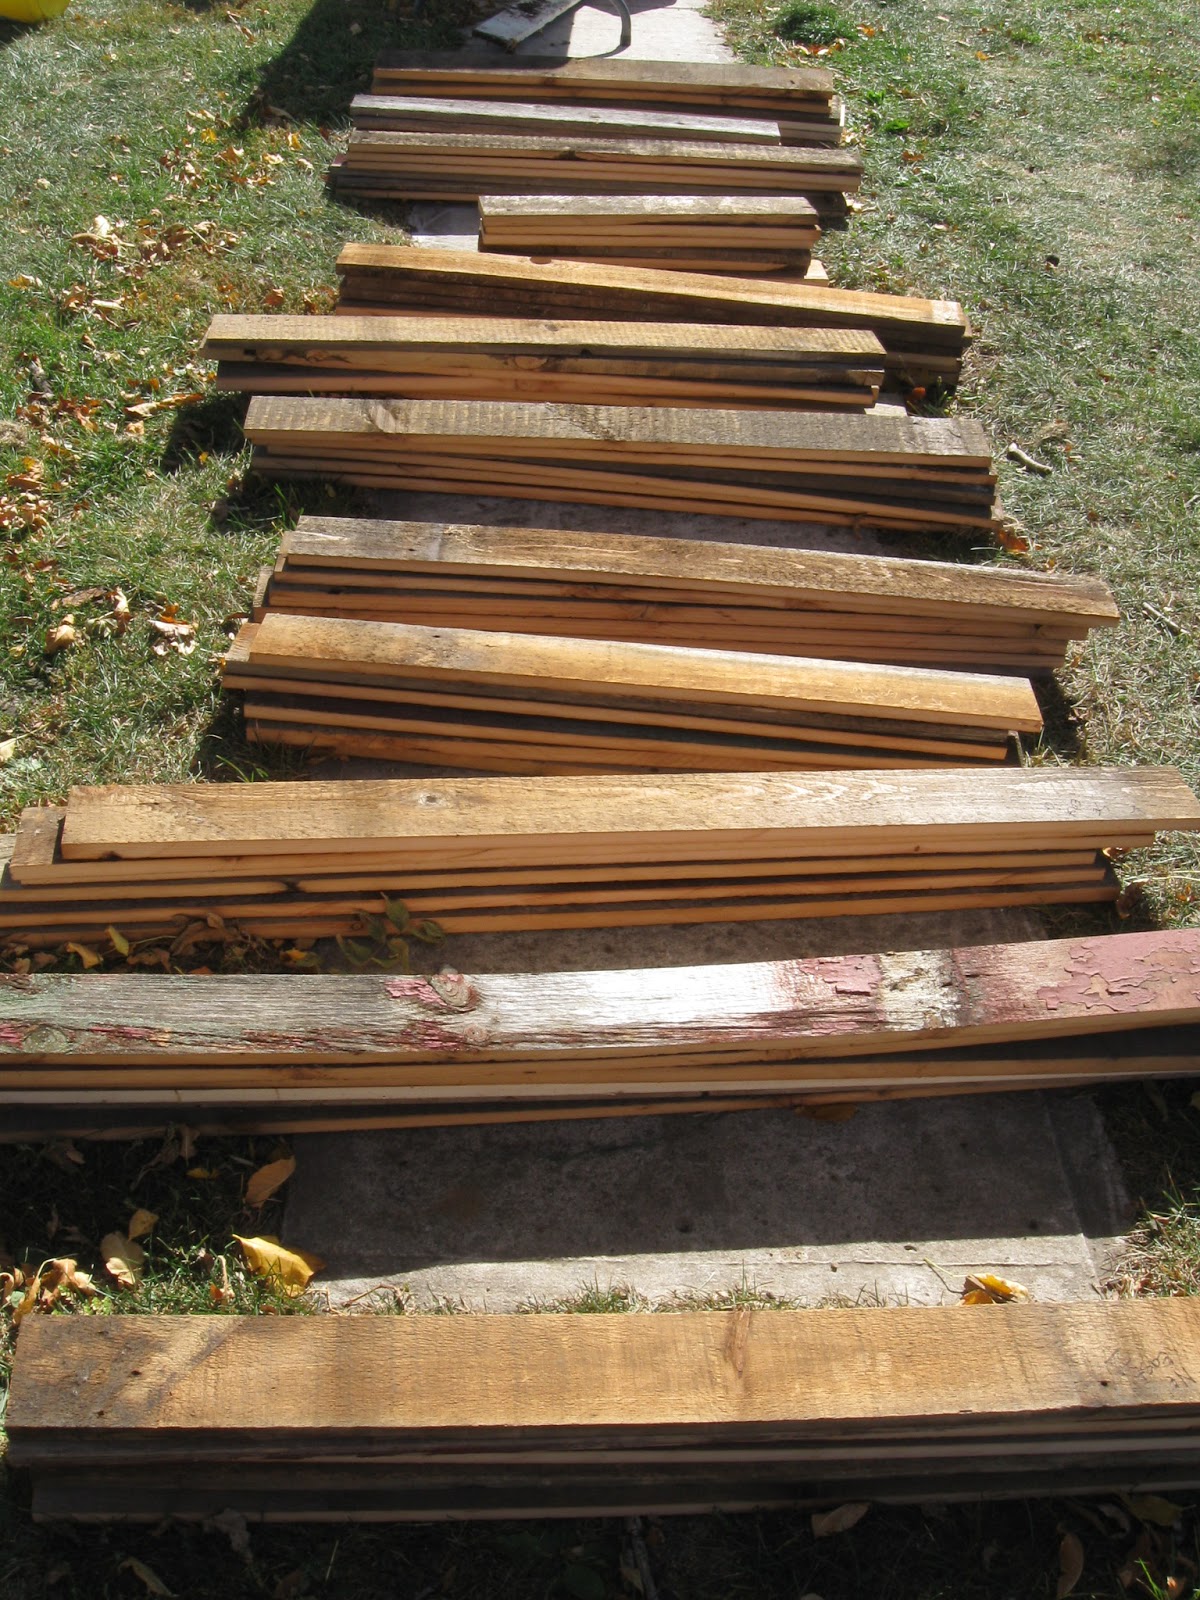 |
| Every pile of six was to make two shutters for either side of each window. |
3. Cut six pieces of wood for the battens (about two inches wide) to join the shutters together (these six pieces will be the narrower, shorter pieces of wood running perpendicular to the shutters to hold them together). The battens should be equal in length to the desired width of the shutters (so if you’d like your shutters to be twelve inches wide, each piece should be twelve inches long. Also, don’t forget to take into account whether or not you’d like a small gap between each piece of wood on the shutters–if you do, the measurement of the gap will need to be included).
3. Begin assembling the shutters. Equally measure where each batten will be placed (top, middle and bottom) and attach securely with wood glue and screws.

4. If you’d like gapped shutters, making a crude jig may be helpful–it allows for the boards to be spread to the correct width and the center board to be centered (see photo below).

5. Paint shutters with exterior paint. Allow to dry before attaching to the house (we discovered it was easier to paint the pieces before assembling because we chose to have a gap between our boards. However, either painting before or after assembly did not affect the final product, gap or no gap, only the time it took to paint them all).

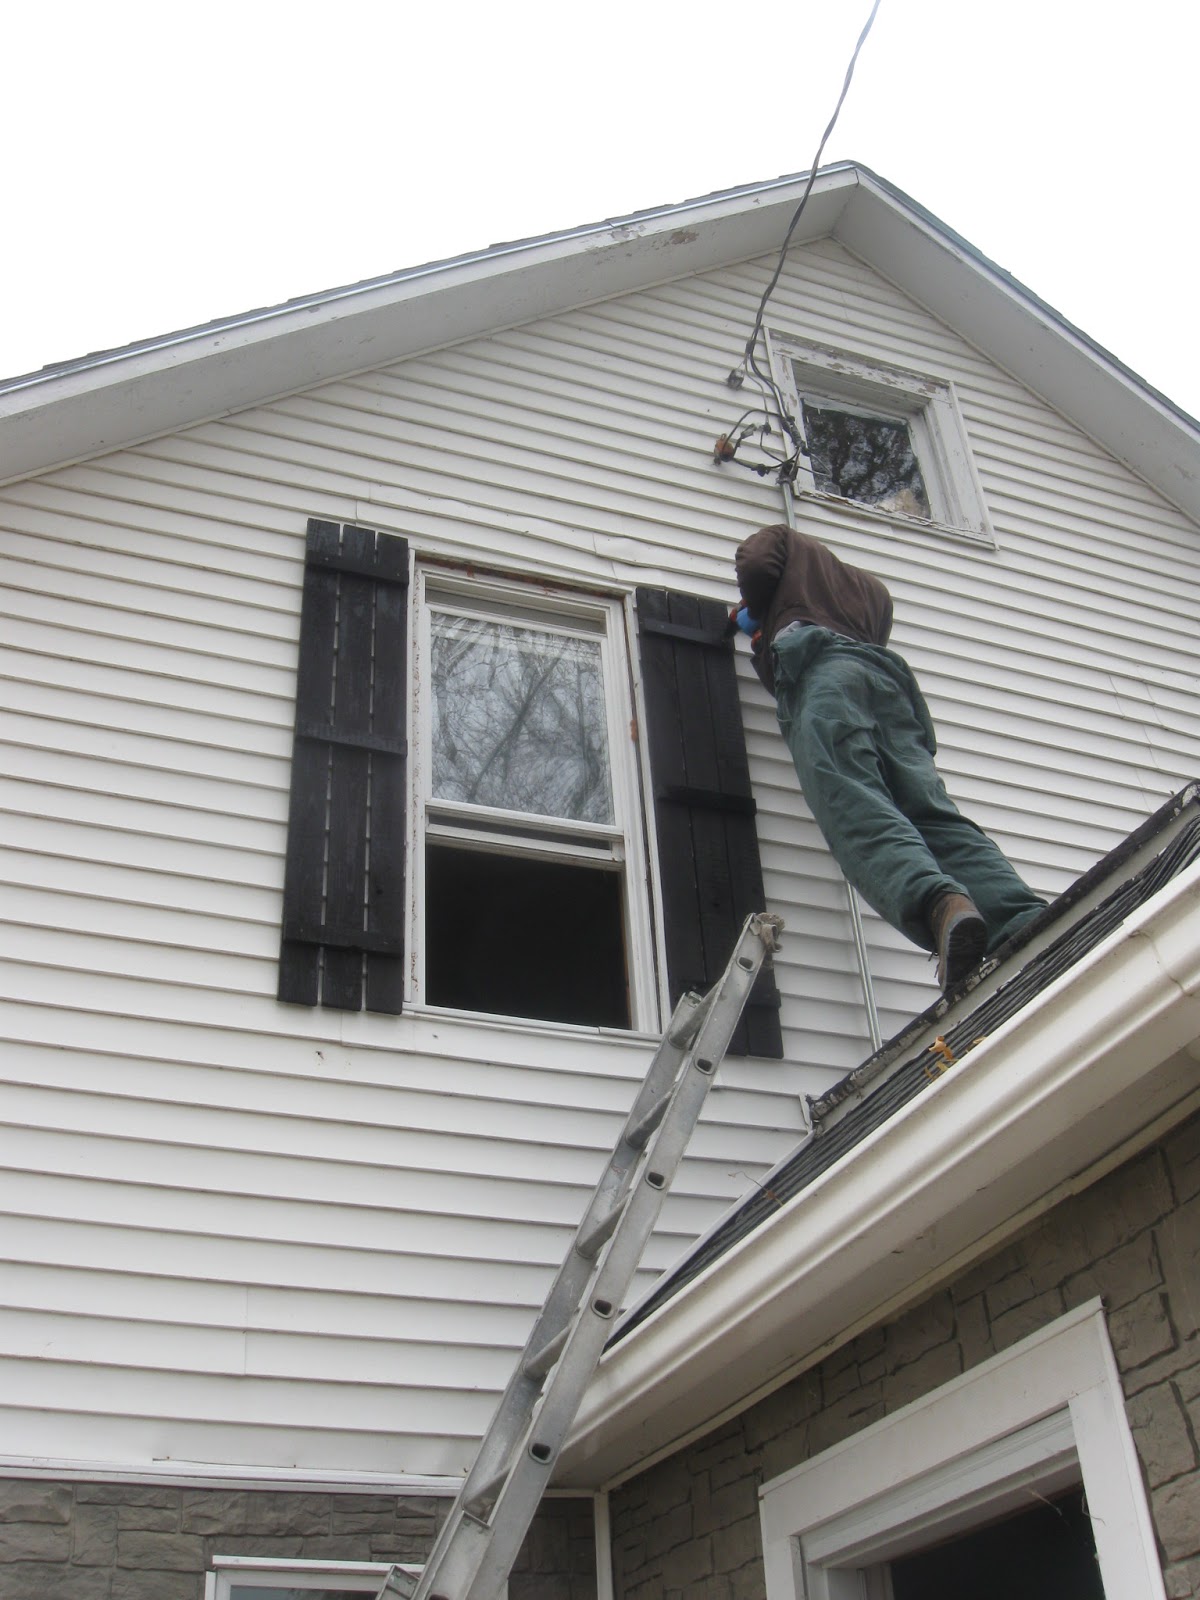
5. Attach shutters securely to the house. They can be hinged but we chose to simply screw them in with sufficiently long exterior screws.
6. Stand back and enjoy your handiwork!
 |
| The finished product. |


2 Responses
Hi! You left me the sweetest comment on my blog quite a while back and it wasn't until I was browsing my old posts that I came across it and finally hopped on over for a visit. I am so happy to be following you now! You're right, it does look like we have a lot in common. When is your baby due, or have you had him by now? You're home is darling; I cannot wait to get out of the apartment situation!
http://www.sewingourlifetogether.blogspot.com
sewingourlifetogether (at) gmail (dot) com
I love these! I'm just not sure about attaching them. We have the same siding you have. So you just get extra long screws and screw through the shutter into the vinyl siding and they stay? thanks for sharing!